French Macarons

I have discovered another theory to my cooking.... if at first you don't succeed, try, try again.
Here's the scoop.... I confess, I went back to the IPhone :) Sadly in the switch, I thought I backed up my photos on my old phone, but alas, I did not. So some recipes to follow, will not have a play-by-play photo :(
This post, however will! Since I went back to the IPhone, I of course purchased a cute case for it. It is a bright teal cover with hot pink detailing and outlining. I'm OCD, so I had to have a background picture that matched. I downloaded an app for this and found a perfect picture! They are hot pink, bright teal (the exact match to my phone case) and bright orange French Macarons. I thought, "perfect, it matches and I love baking!" At work one day, a coworker of mine, Kendal, and I were talking and she suggested that I try to make these. I laughed it off and thought "maybe one day before I die." Well, curiosity got the best of me and I googled how to make these delightful morsels. It contains 4-5 ingredients, and the execution of them seemed simple! (Key word, "seemed") Make a meringue fold in dry ingredients. Uh, not hard right?! WRONG! These are the most finicky things in the world....But I was determined! I will show you my disaster pictures and what I learned I did wrong. I tried two recipes (there are about a million of them out there) from blogs that also had "play by play" photos.
Here we go!
Simple Macarons
(from bakeat350.blogspot.com)
Ingredients:
3/4 cup ground almond flour/meal
2/3 cup powdered sugar
2 large egg whites
3 1/2 tablespoons granulated sugar
gel food coloring (optional)
Use a 1 1/2 inch cookie cutter (I used a shot glass) to trace guidelines for piping the macarons on a piece of parchment paper. Leave about 1 inch between each circle. Flip the parchment over and place on top of a cookie sheet.
Combine the almond flour and powdered sugar in a food processor. Process for about 30 seconds to 1 minute until combined. Sift the mixture or shake through a fine sieve into a bowl. (about 2 tablespoons of larger pieces are okay, just stir them into the rest.) Set aside.
 |
| I'm lucky to have a mini food processor to mix this stuff! |
 |
| All mixed up! |
In a bowl of a stand mixer fitted with whisk attachment, whisk the egg whites on medium-low until frothy.
 |
| Frothy-ness |
Increase the speed to medium, and continue to whisk until soft peaks form, about 2 minutes. With the mixer running, gradually add in the granulated sugar. Scrape down the side of the bowl if needed.
 |
| Soft peaks forming :) |
 |
| Opened my package of food coloring gels and apparently my only options are green and blue... someone switched the other two colors out! Stinkers.... I was mad for a while haha. |
Increase the speed to medium-high, beating until the eggs are glossy and come to a stiff peak. Add food coloring, if using, note that more food coloring may affect the baking time. Beat until the egg whites form a clump in the whisk attachment and are stiff.
 |
| food coloring added! |
 |
| Stiff peaks. If you push on the "fluff" with a finger, it will feel stiffer than it looks. It will also stay inside your whisk without falling. |
Remove the bowl from the stand mixer and sfit about half of the almond flour mix over the meringue. Use a silicone spatula to fold into the meringue, using about 10 strokes. Don't expect it to come together completely. Sift the remaining almond flour mix into the bowl (it's okay to add in the 2 tablespoons or so of the larger pieces that won't go through the sifter.) and continue to fold into the meringue.
 |
| The "2 tablesppons" that won't go through |
Don't worry about being gentle; you want to deflate the egg whites. Fold until the mixture comes together, but avoid overmixing. Be sure to scape the bowl to avoid stray bits of meringue remaining unincorporated. The batter will loosen and start to fall in the "ribbon" off the spatula. A ribbon or dollop of batter dropped back into the bowl should reincorporate into the rest of the batter in 20-30 seconds. This should take no more than 50 strokes total.
Spoon the 1/2 batter into a piping bag fitted with a 1/2" round tip. Pipe the batter onto the parchment, using the circles as your guide. Repeat with the remaining batter.
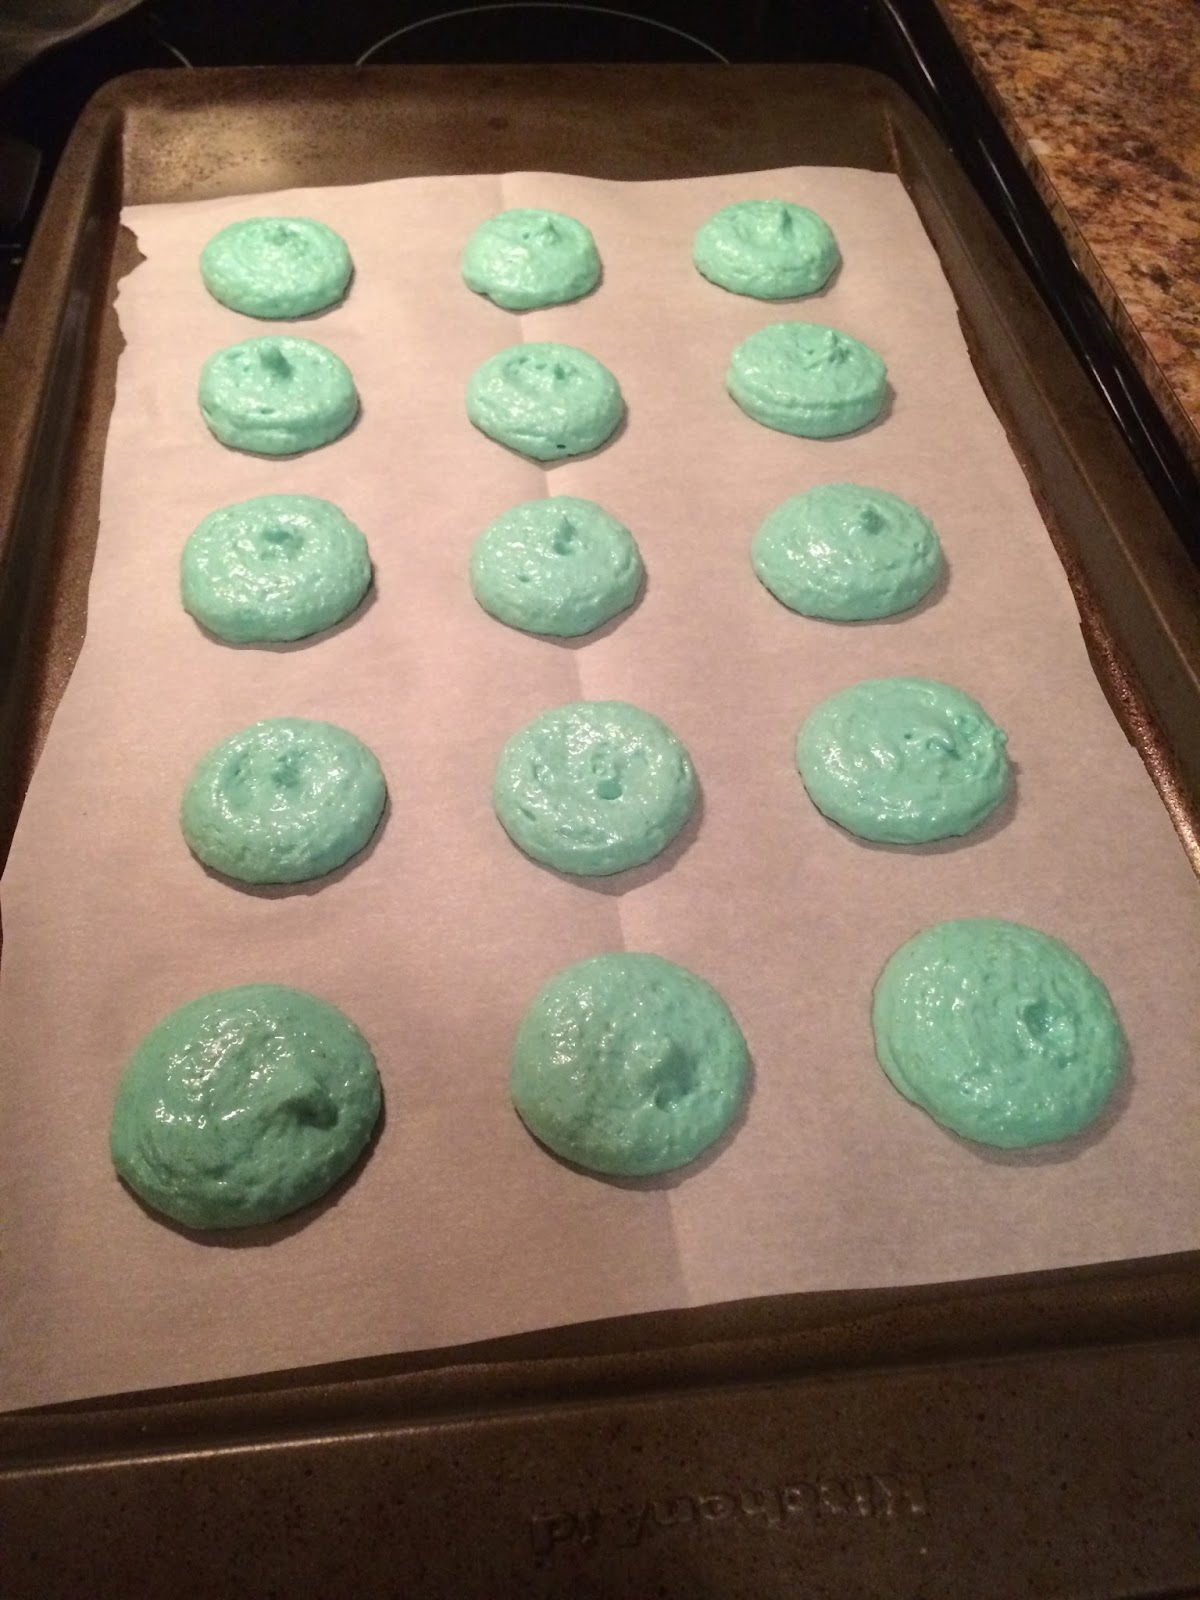 |
| Looks promising??? |
Let the piped batter to dry for about 15-30 minutes while the oven preheats to 350 degrees.
Bake for 11-12 minutes, rotating the pan halfway through baking. The tops should be firm and glossy and the bottoms of the shells should have formed "feet" or frills at the bottom. When done, the cookies will lift fairly easily from the parchment.
Remove from the oven, place the cookie sheets on a wire rack and let cool completely on the sheet.
Once cool, remove cookies from parchment and apply any filling you desire on one side of cookie and stack another cookie on top as if to make a cookie sandwich.
 |
| FAIL |
 |
| The texture seems right on the inside, it is cake-like in the middle, soft and moist. Crispy shell outside, and boy does it taste GOOD! |
So let's try this again.....
This time I used a different recipe and will try to not make my meringue so stiff and will definitely mix my batter more. This next recipe was VERY helpful and I learned more about what I did wrong.
French Macarons
(from delightfully-tacky.com)
Ingredients:
3 egg whites
1/4 cup white (granulated) sugar
2 cups confectioners sugar (powdered sugar)
1 cup almond flour
Pinch of salt
1/4 teaspoon cream of tartar
Sift almond flour and powdered sugar. What remains will be the larger clumps of almond pieces. Just discard those/snack on them. You want really fine powder mixture to create a smooth and pretty top to your macaron (Eureka! First thing I did wrong!).
Beat egg whites until foamy (frothy), then add salt, cream of tartar and white sugar for 8-10 minutes. TIP #1: egg whites should be room temp. (if you didn't let large eggs sit out prior to starting, just submerge them in warm water for 5 minutes.)
Whip until they form a peak that stands upright. Then add the food coloring. Color does fade as it cooks, so do a shade or two darker than you want them to be.
Fold your flour/sugar mixture into the egg white mixture. This part is really critical.. Under mix and your macarons will be lumpy and cracked when they bake with no feet (Eureka! Second thing I did wrong!). Overmix and your macarons will be flat and won't have feet. With this recipe I found that 65-70 turns of the spatula when folding is about the right amount. You want the batter to move like lava when you're done.
Transfer batter to a pastry bag or if you're really fancy like me and don't have one, use ziplock bag. Cut a little bit of the bag's corner off and pipe out 1 inch rounds on a baking sheet lined with parchment paper.
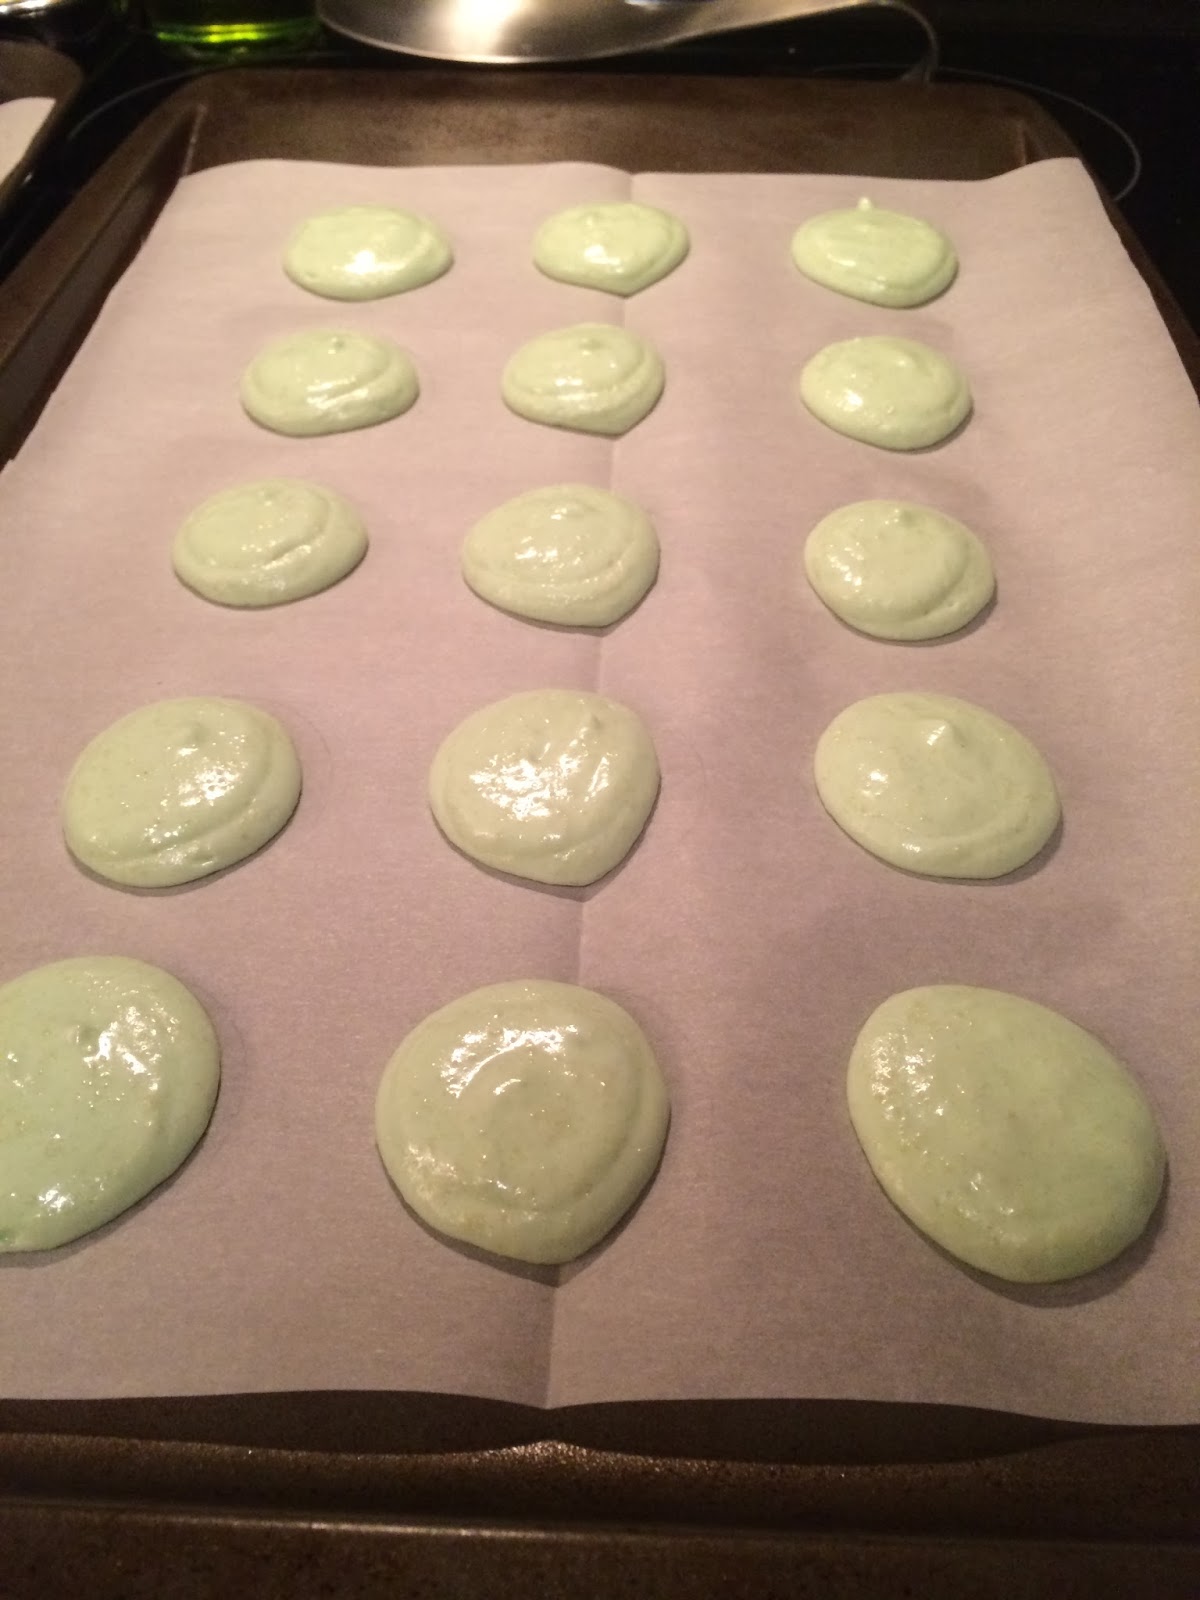
 |
| I did this recipe word for word, but didn't make the meringue as stiff this time. I knew immediately when I piped these out, this was wrong... They seemed to spread too much and look too thin. |
Once you've filled your cookies sheet, rap the pan on the countertop hard at least 2-3 times to release air bubbles. This will prevent the tops of your macarons from cracking (maybe something else I did wrong!). Let them sit out for 20 minutes up to an hour if you want. This will allow them time to dry out a bit before hitting the hot oven. They should be tacky to the touch, but not stick to your fingers. This is when I preheat my oven to 300 degrees.
Only put one tray of the macarons in the oven one at a time. This will ensure that each tray gets the ideal spot in the oven. The macarons sitting out waiting for the oven won't mind, as they are supposed to sit out for a while anyways. Bake for 20 minutes. If they stick to the tray, they are not done. They should easily removed from the parchment paper.
 |
| Bahahahahaha... at least I got "feet" this time...lol |
 |
| EPIC FAIL |
Okay so Third Time's a Charm right?!
I realized that the thickness of the first batter was correct. I made the second recipe word for word again for this third go a round and this time made my meringue stiff again.
 |
| Add caption |
 |
| Looks correct! I will bang these out on the counter a few times! |
 |
| smooth tops (for the most part) and a few cracked ones in the back, but they are fluffy and have feet! |
 |
| Added store bought cake icing in the middle |
 |
| These are less "cake" like in the middle, so I think next time I will try the first recipe, but make the correct adjustments. That didn't stop me from eating all three of these though! YUM!!! |
All in all, I learned waaaay more about cooking making these delish little morsels! I also learned a lot about meringue. I had only made meringue one time and so this was sorta new territory for me! I've never baked with almond meal either and never even knew it existed! I hope this inspires you all. Not necessarily to make these, but to always try again! I am not always the most amazing baker, but I try not to let that stop me! Practice makes perfect, perfect yummy things, that is!


Comments
Post a Comment